Your cannabis sees have finally grown into healthy plants with ripe buds. And now it’s time to harvest. But you’re not done with your grow just yet. To achieve high-quality bud, you need to dry and cure them. Wet buds won’t burn, after all. Properly drying and curing your bud will give you a smoother smoke and help you preserve your bud for the long haul.
Why Cure Bud
Once your buds are cut, it’s understandable that you’re eager to try them. However, methods that dry out your crop too quickly can cause problems. Curing your cannabis, or letting it dry slowly both on and off the stalk, is similar to aging whiskey. Taking it slow results in a stronger, tastier, longer-lasting product.
Preserves Terpenes
Drying cannabis too quickly usually involves adding heat or sunlight to the process. That destroys delicate terpenes, which are the chemicals responsible for marijuana’s scent and flavor. Allowing your weed to cure preserves these terpenes, giving you a smoother, more pleasant smoke later.
As a bonus, letting the buds cure gives the natural chemicals in the flower to break down compounds you don’t want. Extra nutrients from your grow are processed by enzymes that are still active. Drying the plant too quickly can break these enzymes down and make your cannabis harsh upon consumption.
Increases Potency
Just because you’ve cut down your plant doesn’t mean all its processes stop automatically. If you’ve ever seen a cut rosebud bloom in a bouquet, you know that a plant is still alive even without roots. That means that your cannabis plants are still producing THC for a while after harvest. However, this biological process requires water. If you dry your plants too quickly, you cut that process short, and your end result is not as strong (aka “week weed”). A slow cure can improve the strength of your buds.
Helps Preserve Bud
Finally, curing helps your cannabis remain stable. The slow, careful drying process keeps your plants free from mold and bacteria while preserving potency. A properly cured harvest can keep for up to two years, as long as you store it in airtight, cool, dark containers.
Equipment for Curing and Drying Cannabis
There are some basic tools that make drying your crop much easier.
- Clothesline or Hooks – First and foremost, you need a place to hang your plants. Clotheslines work great, because they allow for free air movement around your plants. Hooks hanging from the ceiling work well too, as do rafters.
- Twine – String helps keep your plants tidier. If you’re hanging from hooks or rafters, string also helps you hang your plants appropriately.
- Clips or Rubber Bands – Rubber bands or clothespin clips can be effective for hanging your plants. You can also simply tie your plants to your hanging place.
- Sharp snips – Snips are for trimming your plant. The sharper the snips, the cleaner the cut. Thin blades help you get into tricky places around the bud.
- Rubber Gloves – Cannabis is notoriously sticky. Gloves help keep your hands clean of trim, and prevent skin oils from killing your plants’ potency.
- Trays – Trays help you keep your trim area clean, and allow you to rescue trim and keef that you might otherwise lose when you process plants.
- Airtight Glass Jars – Your buds will cure best in airtight glass mason jars. Plastic can work too, but the airtight part is key to the curing process.
- Environmental Controls – To control the speed at which your plants dry, you might need to invest in environmental control equipment. This can be humidifiers, dehumidifiers, air conditioners, heaters, or a combination of the above, depending on your drying room.
- Fans – Having airflow in your drying room allows your plants to dry consistently. It prevents localized humidity from building up around your plants and potentially causing problems. It also disrupts the potential growth of pests.
How to Dry Cannabis
Drying cannabis is straightforward. The biggest trick is letting it dry slowly. If your cannabis dries out too quickly, you can face problems from an uneven dry. The aroma can be lost if the bud dries too quickly. On the other hand, if you take too long to dry your cannabis, you risk mold developing and ruining all your hard work.
The best way to dry cannabis is to cut down the entire plant. With rubber bands or secure clips, hang the plant upside down from a clothesline or beam. The room should be cool and dark. About 68 to 70 degrees Fahrenheit is a good temperature for drying cannabis.
You should also keep an eye on the humidity level of the room. Humidity is what dictates how quickly your bud will dry. The less humidity in the room, the quicker your plant will dry. Ideally, you’ll keep your humidity between 45% and 50%. This keeps your buds drying at a reasonable pace without encouraging mildew or bud rot to set in. In perfect conditions, your weed should dry over the course of seven to fourteen days, depending on how it was trimmed.
Trimming brings up a point of controversy: should you trim your plants before or after you dry? There are proponents for both schools of thought. The biggest consideration is what type of work you’re willing to do.
Wet Trimming
When you wet trim your plants, you cut off the majority of the plant’s leaves before you hang it up to dry. It’s the simpler process. Plants are less delicate when they’re still wet. You can more easily bend back leaves near the buds in order to trim them off.
With wet trimming, you’re working while the buds are at their stickiest. On one hand, that helps you keep your trichomes attached to your plant. On the other hand, they will also stick to everything else: your gloves, your snips, your trays. Wet trimming involves a lot more mess than dry trimming.
Taking the big leaves off means that wet trimming saves you a lot of space. Removing all the extra leaves lets you store your drying plants in smaller spaces. Most wet trims will result in a stalk that looks like a lollipop – much less bulky than an entire plant. If you’re working with minimal room, wet trimming is a good choice.
Wet trimming also speeds up drying time. Removing the leaves means that there’s less water to dry out in the first place. This can be a benefit or a drawback. In humid climates, you’re facing longer drying times regardless. In that case, speeding up your dry can help you prevent mold growth. However, in dry climates, you can dry too quickly and kill the biological processes that are wrapping up.
Dry Trimming
Dry trimming involves cutting off the leaves after you’ve dried the plant. This is a little trickier than wet trimming. Since well-dried plants are done when twigs snap, you can easily crumble parts of the plant you’re trying to maintain. A smart move with dry trimming is to cut the top six inches of each cola away from the rest of the plant. The rest is all compost now, anyway.
A benefit to dry trimming is that your plants aren’t sticky during the process. Don’t worry, a little of that will come back with the curing process. However, the lack of stickiness means that it’s very easy to accidentally knock off the trichomes that are the whole point of the process. Dry trimming should always be done over trimming trays, so you can recover the inevitable trichome casualties. Dried trichomes on their own are keef. That’s the good stuff.
By leaving all the vegetation on the plant when you dry, you’re taking up more space. You are hanging up the entire plant. For dry trimming, the drying process needs almost as much room as the original grow did. If you’ve got that much space, great. If not, then you might not want to dry trim your plants.
Finally, dry trimming slows down your dry. Most of the time, that’s what you want. A nice slow dry keeps your terpenes intact, your THC levels high, and sets you up for a good cure. Just watch out for mold growth if your humidity gets too high.
How to Cure Bud
You can start the curing process proper once your plants are dry. Small twigs on the plant should snap instead of bend, and the stalk should crack – at this point, you can begin curing.
Whether you went the wet-trim of dry-trim path, you should separate your buds out before curing. Do this over trimming trays, to hold onto your trichomes. When your buds are separated, place them in airtight jars. Quart-size mason jars work well for this, but airtight plastic Tupperware can work. The goal is to be in complete control over the amount of oxygen your buds receive. Zipper bags don’t usually work, because they are not actually airtight.
When placing your buds in the jars, be careful. You should fill the container to the top without crushing the buds. Seal the container and check to make sure that the buds aren’t being squished. That encourages mold growth, which you want to avoid. A little wiggle room is good.
You can check your buds at this point to see if you’re truly ready for curing. If you gently rattle the jar, your buds shouldn’t stick together. Any sign of clumping means that you should dry your buds for another few days before you start the cure.
Once you’re sure the buds are ready, you can store the jars in a dark, cool place. Light and heat will both sap potency by destroying the cannabinoids you want to protect. Closets and cabinets that don’t often get opened work well for this.
Now comes the process of “burping” your jars. Opening the jars regularly lets the plants breathe and helps air out extra moisture. The first time you open your jars, you might notice that your plants are no longer crispy dry. That’s normal. Even when the outside of the bud is crisp, there can still be moisture on the inside. That moisture is what fuels the curing process.
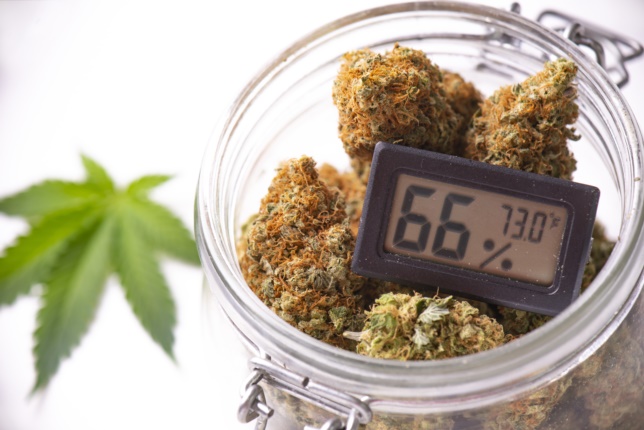
The trick is letting it air out so it’s never humid enough inside the jar to cause problems. You want your jars to stay between 55% and 65% humidity inside. If you ever smell an ammonia scent, then your buds are too damp. Bacteria is starting to grow, and you need to inspect the buds and begin drying them again right away.
For the first week, you need to open your jars two or three times a day. That’s the period during which most of the remaining moisture will be escaping. After the first week, you can taper to opening your jars once a day. Curing can be considered “complete” after three weeks. However, cured cannabis continues to improve from four to eight weeks, and some growers go as long as six months.
How to Fix Over-Dried Cannabis
Sometimes things happen, and your cannabis gets too dry. Often, this can be fixed. There are a few methods that can help you recover your too-dry buds.
Damp Paper Towels: Move your cannabis buds to a larger airtight container. Dampen a paper towel with distilled water, and place it in the container with the bud without letting them touch. Let sit for several hours before removing the towel. The extra humidity should help your buds rehydrate a little.
Fruit Peels: Like with the paper towel, place cannabis in a larger container. Place orange peels in the container as well, but don’t let them touch the buds. Let sit for a day, and then discard the peels.
Boveda Humidity Packs: Finally, there’s a commercial solution: humidity packs. These are disposable packs that help keep the humidity at a specific level. You can use these packs from the beginning, to keep curing cannabis at a perfect 62% humidity.
Curing cannabis might seem like a lot of extra time, but it’s worth the patience. Well-cured cannabis is smooth, cool, and pleasant to use. Curing cannabis helps it last longer, smoke better, and hit harder. Curing isn’t technically necessary, but it’s worth the wait.